Data Package: Online Testing |
Role: Account Holder or Administrator |
A roster determines the groups in which students are tested and the parameters of their score reports. Changes to the roster can occur for several reasons:
● A family recently moved to the district.
● A district contains a transient population, such as farm or other seasonal workers.
● There were administrative errors in the initial submission of student data to the roster.
Riverside Insights® creates rosters for you based on the student and location data you provide. You may occasionally need to add a student to a roster for the current test event.
The Add a student to the roster feature allows you to quickly add a student for testing.
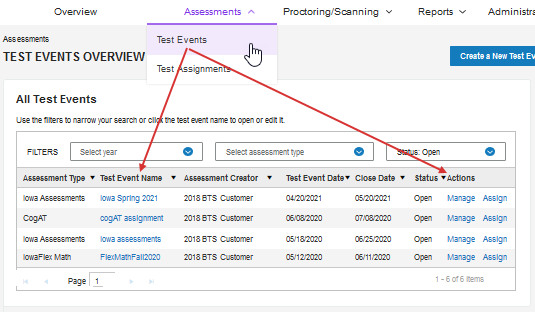
1. Open the test event associated with the roster to which you want to add the student.
a. From the Assessments menu, click Test Events. The Test Events Overview page opens.
b. Click the name of the test event in the Test Event Name column or click Manage in the test event's row.
Note: If you don't see the test event name in the table, use the search filters and column sorting options to narrow your list of events. See Finding a Test Event for detailed instructions.
Your chosen test event opens on the Test Event page.
2. In the Complete Tasks list on the right, click Add a student to the roster.
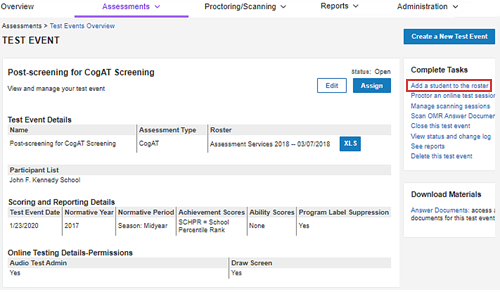
The Add Student page opens. Asterisks (*) denote required fields.
Note: The platform has changed to the Administration menu. Only Administrators and above have access to this page.
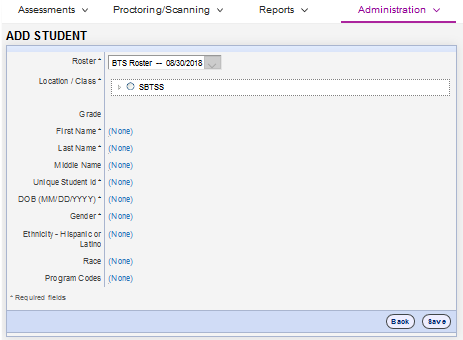
The name of the roster that is associated with the test event automatically appears in the Roster field and cannot be changed.
3. In the Location/Class list, find and select the location to which you want to assign the student. You must assign the student to a class-level location. Click right arrows to expand nodes on the hierarchy, down arrows to collapse them.
4. Enter information in the required identification fields. (Click (None), and then type or select the entry.) Use the following guidelines:
– For the Unique Student ID field, type a unique student identification number in the box. The length may be up to 10 characters. You may use any combination of the following values:
○ A–Z
○ 0–9
○ dashes
– For the DOB (MM/DD/YYYY) field, you must enter the date of birth in MM/DD/YYYY format.
Note: If you enter a date of birth that is out of range for obtaining age-based scores, a warning message appears. Verify that the date of birth you entered is correct.
5. (Optional): Enter information in the following drop-down fields:
– For Ethnicity - Hispanic or Latino field, select Y or N.
– For Race, select all applicable races.
– In the Program Codes field, select the applicable program codes (for example, ELL for English Language Learner, Gifted Student, IEP for students enrolled in Individualized Education Programs).
6. Click Save Student.
A confirmation message box affirms that the student has been successfully added to the roster.