The Roster Report lists scores for the group you select. Unlike other reports, you select a group of examinees after you have completed the fields below and click Continue.
View Roster Report OutputView Roster Report Output
The Roster Report provides scores for each examinee in the selected group. The top of each page of the report provides the grouping information. Examinees are listed alphabetically by last name unless the last name is replaced by the student ID, in which case the examinees are listed by ID number, from least to greatest. Within the report, the first column of each row contains examinee names (or student IDs), testing date, and if applicable, the examinee's grade and months in that grade at the time of testing. The second column contains the examinee's date of birth and teacher's name, if available. The third column contains the examinee's identification number, age, and the examiner's name. The remaining columns in the row provide the examinee's scores. Sample Roster Reports for each output format are provided below. PDF and Word
Web Page
Note: Data in these samples are for illustrative purposes only. |


To run the Roster Report:
On the dashboard, hover over Reports and click Create Report. The Create Report page opens.
Complete the fields in the following steps.
Note: Some fields offer additional instructions. Click more to learn more.
Product: Select the product for which you want to run the report.
Report Type: select Roster Report.
Test Record: select a test from the list..
Score Selection Template: Use the default or select a new template. moremore
Click
in the Score Selection Template
field.
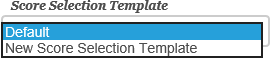
It you
do not want to use the default, click New
Score Selection Template, New Template appears above the
field.

Click
Add Template to open the Name Your Template window.
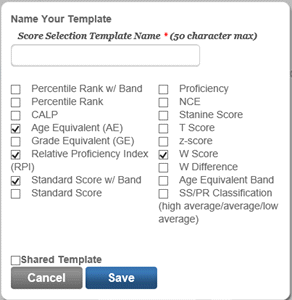
Select the options for your template and name it.
Click the Shared Template check box if you want to make this template available to other users.
Click Save to save this template.
Content: Select the content (content fields depend on the report selected.) moremore
Note: The Content field is populated according to the test record that you selected. This example is for WJ IV Test of Oral language.
Check
the options you want to include.

Click Advanced Content Filters if you want further filter the content.
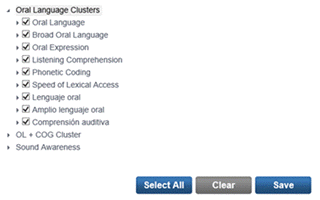
You can click the drop-down arrows for Oral Language Clusters, Ol + COG Clusters, or Sound Awareness and select or un-select options. Select any or all intervention options.
Click Clear to clear all checked boxes.
Click Select All to select all items.
Click Save to save your selections.
Options: Select from the list of options.
Grouping Options: Select how to group the output.
Output Format: Select PDF, Web Page, or Word as the output format.
Click one of the buttons:
Run Report to run or save the report now. moremore
When you click the Run Report button:
If you selected Web Page, the report is displayed on your screen.
If you selected PDF or Word for the output, follow the instructions that appear.
Save to My Reports to save to your dashboard to open later. moremore
When you click Save My Reports, the Name Your Report page opens.
Type in a name for the report and click Save. We entered February Parent Report for this report.
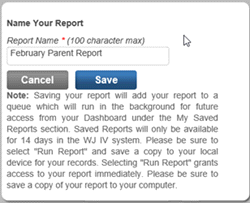
The report will now appear in the My Saved Report section on the bottom left of your dashboard.
View Roster Report OutputView Roster Report Output
The Roster Report provides scores for each examinee in the selected group. The top of each page of the report provides the grouping information. Examinees are listed alphabetically by last name unless the last name is replaced by the student ID, in which case the examinees are listed by ID number, from least to greatest. Within the report, the first column of each row contains examinee names (or student IDs), testing date, and if applicable, the examinee's grade and months in that grade at the time of testing. The second column contains the examinee's date of birth and teacher's name, if available. The third column contains the examinee's identification number, age, and the examiner's name. The remaining columns in the row provide the examinee's scores. Sample Roster Reports for each output format are provided below. PDF and Word
Web Page
Note: Data in these samples are for illustrative purposes only. |