|
Role: Account Holder, Administrator, or Teacher |
Scanning results are available on the Scan Session Details page in Riverside Insights DataManager.
Note: If you just finished scanning and the Scan Session Summary page is open, skip to step 2.
1. Click the Scanning header from any page on the DataManager platform.
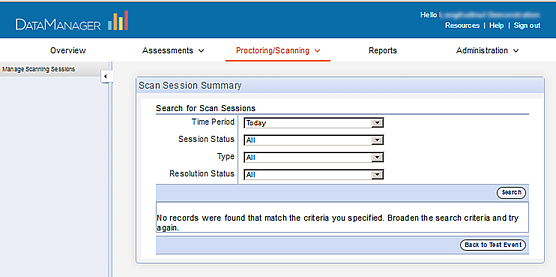
2. The Scan Session Summary page opens.
3. Enter the following information in the drop-down fields:
a. In the Time Period list, select the time period in which the scan session took place (for example, today, last week, or last month).
b. In the Session Status list, select the option that applies to the scan sessions you wish to view: All, Completed, Send to Scoring, or Send Changes to Scoring.
c. In the Type list, select Optical Mark Recognition.
d. In the Resolution Status list, select the status of the scan session you wish to view: All, Scan Sessions with Unresolved Scans, or Scan Sessions with Successful Scans
e. Click Search. Scanning sessions that meet your criteria are listed below.
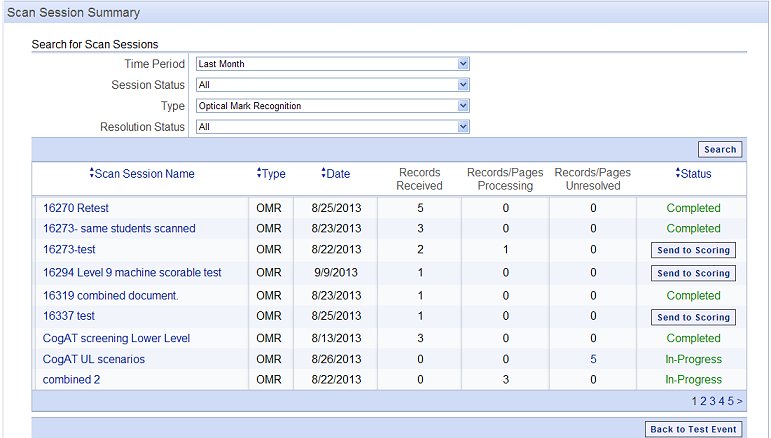
Note: You can sort the list of scan sessions using the arrows in the Scan Session Name, Type, and Date columns. If the list contains multiple pages, you can navigate through the pages using the arrows in the bottom right corner of the page.
For a complete list of Status
displays with brief descriptions, ![]() click
here. To return to the Edit Test Event page, click
Back to Test Event.
click
here. To return to the Edit Test Event page, click
Back to Test Event.
4. In the Scan Session Name column, click the scanning session you want to review. The Scan Session Details page appears. See View the Scan Session Details Page.