
Role: Account Holder or Administrator |
DataManager OMR customers have the option of printing and applying barcodes for each student participating in a test event rather than having each student complete this information manually. To use this feature, you must set your OMR administration preferences to allow for reading and printing barcodes (see Manage OMR Scanning Options). These barcodes must then be printed and applied to the student answer documents prior to scanning.
Note: In addition to the procedure provided below, you can print barcodes from the Assign by Location and Grade page at the time the test assignment is created.
Make sure you have prepared all the necessary materials for this procedure:
– Verify that your scanner's feeder tray contains the required label sheets corresponding to your barcode size and Avery® template.
– Make sure that your label sheets are oriented to your printer's top-bottom, left-right directions and alignment
Important: Barcode labels cannot be adjusted to fit alternative sheet sizes at printing time.
– Use one of the following combinations:
○ 30 labels per sheet, 3 columns across, 10 rows down; each label 1" x 2 5/8"; Avery product numbers 48160, 48460, and 48960 or equivalent (5160)
○ 21 labels per sheet, 3 columns across, 7 rows down; each label 1 1/2" x 2 13/16"; Avery product number 5360
– Use low-gloss or non-reflective toner for printing. This is especially important if you are using Opscan® OMR printers.
1. Click the Assessments menu at the top of any page, then select Test Events.
The Test Event Overview page opens. All of your open test events are listed in a table.
2. Click Assign in the row of the event for which you want to print barcodes
The Test Assignment Home Page opens.
3. In the Navigation menu, click View Test Assignments. The View Test Assignments page opens. OMR assignments that were set up for barcodes are indicated by a barcode icon in the Actions column.
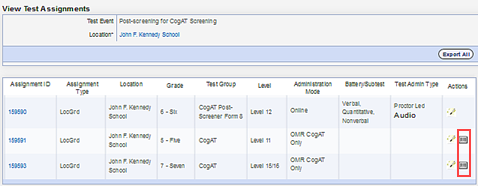
4. In the Actions column of your test assignment, click the barcode label for the assignment. A confirmation box displays the label size your system is configured to use.

5. Click Continue to proceed. A File Download dialog box appears.
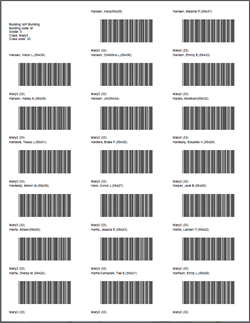
6. Click Open. Adobe Reader opens the PDF that contains the barcodes of all students set up for this test assignment.
7. (Optional) To save this file, click File in the top menu bar, point to Save As, and click PDF. Follow your browser's prompts to specify a location and name for the barcode file.
8. Print the barcode labels according to the requirements noted in the Before You Begin section of this page.
Important: For Page Sizing & Handling in the Acrobat Print options, select Actual size.
9. Apply each label to its corresponding answer document.
Continue with Prepare Answer Documents for Scanning.