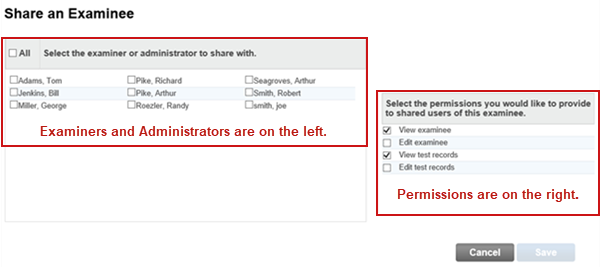
You can share the examinees that you added yourself with one or more examiners. You can choose the permissions to:
View Examinees
Edit Examinees
View Test Records
Edit Test Records
1. You can share examinees in two ways:
– Share
one or multiple examinees from the dashboard or from search results:

○ To share with one examiner, click the share icon on the row of that examiner.
○ To share with multiple examiners, click the check box for the examiners, and then click the share icon in the bottom row.
– Click
the Share Examinee button on the
Examinee Information page to share that examinee.

The Share Examinee page opens.

2. Click the check box on the left side of the page beside each examiner with whom you want to share information for the examinee.
Note: If different permissions should be granted to different users, select only those users to whom you will assign the same permissions. Then finish this procedure and repeat Steps 2-4 for those to whom you want to assign different permissions.
3. Select the permissions to grant to the selected users.
– View examinee: Allows the user to view the examinee's demographic information on the Edit Examinee Information page.
– View test records: Allows the user to view the examinee's test record information, including scores on specific tests on the Test Records/Checklists page.
Note: The View test records option allows the recipient to not only view test records and scores but also to create new tests for the shared examinee(s), to enter scores for those tests, to save and commit the records, and to run reports. It prohibits editing only of test records that were created by you (or another shared user) and are in progress or saved, or tests that were assigned by you and not yet begun.
– Edit examinee: Allows the user to view and edit the examinee's demographic information on the Edit Examinee Information page.
– Edit test records: Allows the user to view and edit the examinee's test record information on the Test Records/Checklists page.
4. Click Save.
See Also