Data Package: Online Testing |
Role: Account Holder, Administrator, or Teacher |
These instructions apply to creating assignments for the online testing mode only. Refer to the Online Mark Recognition (OMR) segment of the online help to set up OMR test assignments.
The following rules apply to test assignments in DataManager:
● Test assignments are created within the larger structure of a test event. They assign a location, mode of testing, test form, and test level to one or more grades of students within the larger test event parameters.
● Once a test session has been opened for the test assignment, the assignment cannot be changed.
● Once students begin testing in an assigned mode (online or paper-pencil), they must complete the test in that mode or start over and complete the entire assessment using only one mode.
● Assignments can be overridden if individual students require separate, custom assignments. Subsequent edits made to location- and grade-based assignments have no impact on a student override. If you delete the student override test, that student reverts back to the group assignment.
1. Access the Test Assignment Overview page. You can do this from any page on the platform. Below are some common ways.
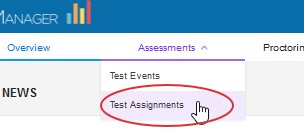
➔ From any page, click the Assessments menu, then Test Assignments.
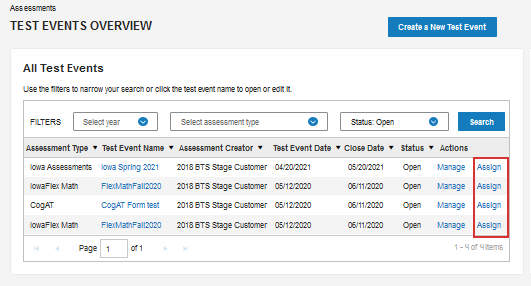
➔ OR: From the Test Events Overview page, click Assign under Actions in the row of the test event.
➔ OR, to edit or confirm details for a test event first:
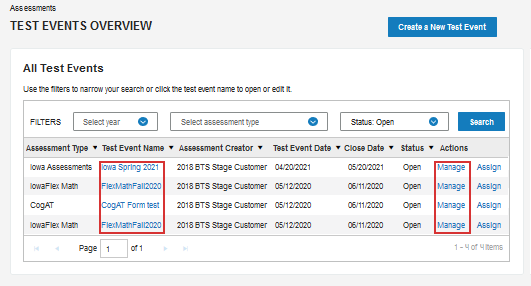
a. Click the Assessments menu, then Test Events from the submenu.
b. From the Test Events Overview page, click the name of the test event or the Manage link under Actions.
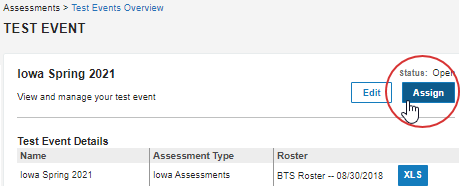
The Test Event details page opens.
c. Click the Edit button on the Test Event page, make any changes to the test event, then click the Assign button.
The Test Assignment Overview page opens. The first time you open it, a message at the bottom of the page tells you that no assignments have been created for this test event.
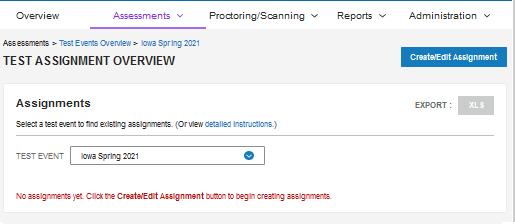
2. Click the Create/Edit Assignment button.

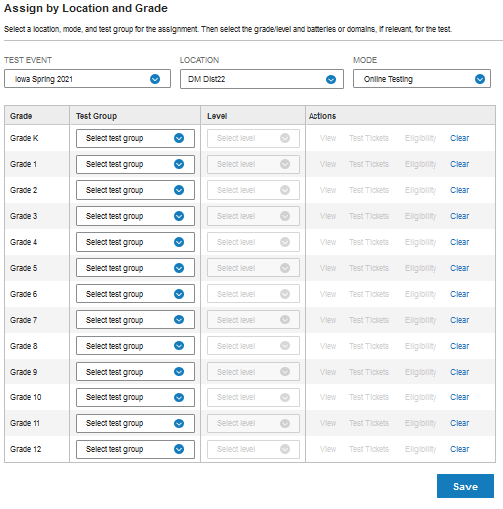
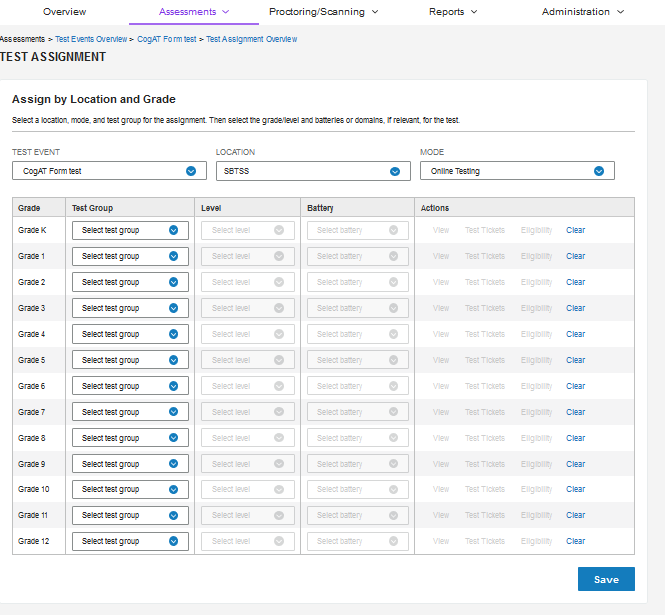
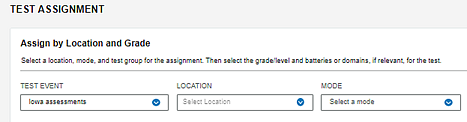
The Assign by Location and Grade page opens. The TEST EVENT box populates with the most recent test event that has been set up in DataManager.
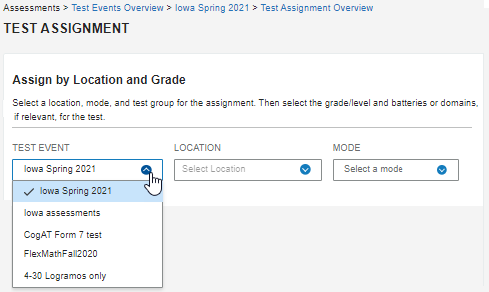
3. (Optional:) Either before or after step 2, change the TEST EVENT for which you are creating assignments by clicking the drop-down arrow and selecting one of the available test events in the list.
4. Select a location for the assignment.
Tip: Select the highest level in the hierarchy provided to you. This encompasses the largest pool of students for testing while allowing for walk-in students from more specific locations. Use steps a-c below as needed.
a. Click the LOCATION box to display your root hierarchy location.
b. Click the right arrows to expand the nodes of the hierarchy, the down arrows to collapse them.
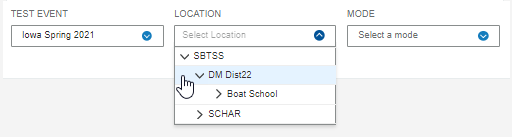
c. Click a location name.
The LOCATION box populates with your selection.
5. Click the MODE box and select Online Testing. (For OMR modes, see OMR test assignments.)
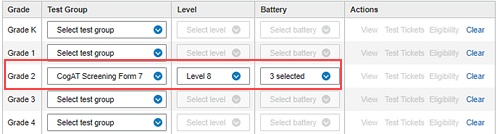
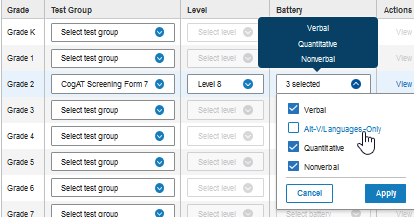
Below your selections, a table containing options for each grade of students on your roster is displayed.
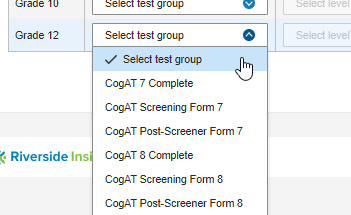
6. Continue this procedure based on your assessment type below. Repeat for each rostered grade that you want to test.
Repeat this step for any additional rostered grades you are testing.
7. Click the Save button at the bottom of the page.
A confirmation message indicates that the test assignment was saved.
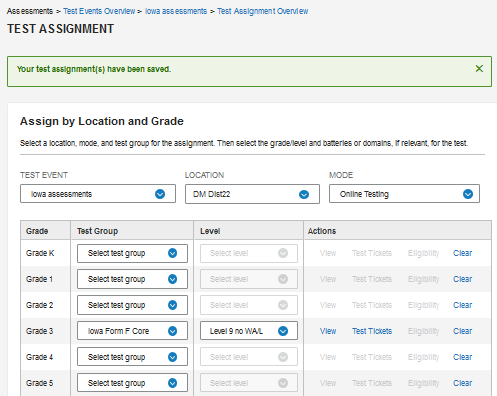
Depending on the assessment type and your location, the following links appear in the Actions column.

– If your location is set to a district level or below, the Test Tickets link becomes active. Click this to create a PDF file for printing student names and I.D. numbers. Shortly before testing begins, distribute as paper slips to help students sign in. (For details, see Print student test tickets.)
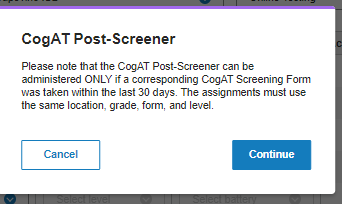
– For CogAT post-screener test only, the Eligibility link becomes active. Eligible students have taken the CogAT screening test within the required 30 days prior to taking the post-screener. Click Eligibility to launch the export of a PDF file containing the names of these students.
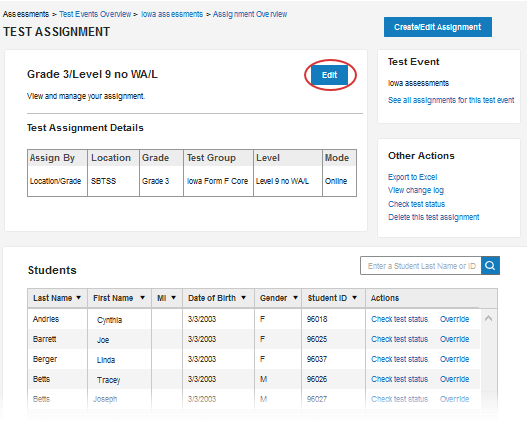
– Click the newly activated View link to see additional details about the assignment you just created, including:
○ a change log for the assignment
○ a view of each student's progress through a series of assigned subtests
○ a Students table that includes, for each student, personal identification information and links to a single student's test status and the ability to create an override for the student if the larger group location and grade levels are not optimal for this particular student.
8. To return to the Test Assignment Overview page, select Test Assignments from the Assessments menu.