Note: You can also add examinees by importing a list formatted as a comma-separated-values (.csv) file. See Import Examinees.
To add an examinee:
Open the Add Examinee Information page by:
Hovering over the Administrative tab, then Examinees, then clicking Add or
Clicking Add Examinee on the My Recent Examinees bar at the bottom center of the page.
Complete the top, General Information, part of the page.
General Information detailGeneral Information detail
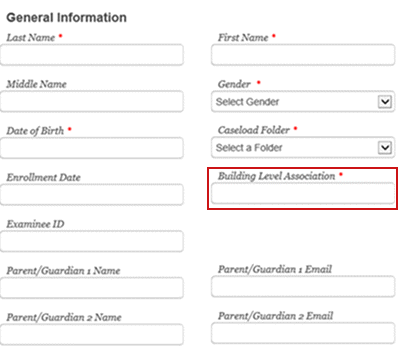
Type the user's last, first, and middle (optional) names in the corresponding fields.
In the Gender box, select M for male, F for female, or U for unidentified.
Click in the Date of Birth box and use the calendar to enter the examinee's date of birth. You can also type the date of birth in MM/DD/YYYY format.
(Optional) In the Enrollment Date box, use the calendar to enter the date when the examinee was enrolled.
In the Caseload Folder list, select the name of the caseload folder to which you want to assign the examinee. Initially, you must assign a new examinee to one of your own caseload folders. The examinee can later be shared with another examiner or moved within your own caseload folders.
(WMLS III only) Click inside the Building Level Association field to view available buildings, then select the one to which to assign your examinee.
Note: The building-level structure will be used for organizational reporting. See your account holder or administrator if there is more than one option and you do not know which to select.
(Optional) In the Examinee ID box, type a unique examinee identification number. The number can be up to 12 characters in length and can include any combination of the following characters: A–Z, 0–9, Blanks.
(Optional) In the Parent/Guardian Name boxes, type the name of the parent or guardian.
(Optional) In the Parent/Guardian Email boxes, type the e-mail address for the parent or guardian.
Complete the Demographic/Programs information at the bottom of the page.
Demographic/Programs Information detailDemographic/Programs Information detail
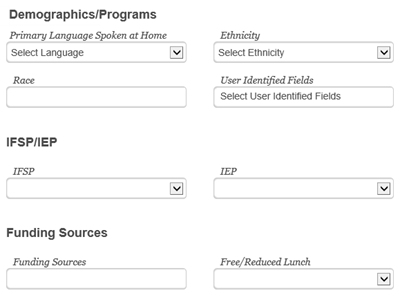
In the Primary Language Spoken at Home list, select the language the examinee speaks at home.
In the Ethnicity list, select an ethnicity.
In the Race box, select all applicable races. Select Close to close the box.
In the IFSP list, select Yes or No to indicate whether the examinee has an Individual Family Service Plan. An IFSP applies to an examinee from birth to three years of age. If Yes, complete the following:
In the Initial Date of Eligibility field, use the calendar to enter the date when the examinee is eligible for services.
In the Exit Date field, use the calendar to enter the date when the examinee is no longer eligible for services.
In the Primary Diagnosis list, select the examinee's primary developmental condition.
In the Secondary Diagnosis list, select the examinee's secondary developmental condition.
In the IEP list, select Yes or No to indicate whether the examinee is receiving an Individualized Education Program. If Yes, complete the following:
In the Initial Date of Eligibility box, use the calendar to enter the date when the examinee is eligible for services.
In the Exit Date box, use the calendar to enter the date when the examinee is no longer eligible for the program.
In the Primary Diagnosis list, select the examinee's primary developmental condition.
In the Secondary Diagnosis list, select the examinee's secondary developmental condition.
In the Funding Sources box, select all applicable programs that provide financial assistance for the examinee. Click Close to close the box.
In the Free/Reduced Lunch list, select Yes or No to indicate if the examinee is eligible for the free or reduced lunch program.
When you are finished, do one of the following:
Click Save and Add Another to add this record then return to the Add Examinee Information page to add another or
Click Save to save this examinee and open the new examinee's Examinee Information page.
Click Cancel to exit without saving the information.
See Also: