Exporting Data creates a file that includes all of the data that you select. This file can be used with another application.
To export data from the BDI-2 Data Manager:
1. From the Import/Export menu, select Export. The Export page opens.
2. Select the data you want to export.
– Organization—Identification and contact information related to your organization.
– Staff—Identification, type/title, and contact information for staff members.
– Students—Identification and demographic information for students.
– Assessment Summary—Summary score information for child assessments (per child).
– Assessment Domains—Domain-related assessment information (per child).
– Assessment Details—Details related to child assessments.
– Assessment Observations—Observations made during testing, in a yes/no question-and-answer format with a text field for notes.
– Student and Assessment Summary—A combination of student demographic and assessment summary information.
– Migration Export—Data exported for import into another Data Manager account or for analysis by a statistical program.
3. Click  to expand the hierarchy list; then select
the level of your organization (location) to specify the scope
of the information that is exported.
to expand the hierarchy list; then select
the level of your organization (location) to specify the scope
of the information that is exported.
4. Select an Export Beginning Date and Export Ending Date.
5. Select Program Note Criteria (if applicable). Select the operator And or Or if selecting two.
6. Specify the type of file you want to export.
– Tab—Select this option if you are using a plain text application, such as Microsoft Notepad®, to organize the exported data. This will create a file in which the information is organized into lines and each item is separated by a tabbed space, as shown in the partial view of an Assessment Domain export below.

Note: This option is not available for the Migration Export.
– Comma—Select this option if you are using a spreadsheet application, such as Microsoft Excel, to organize the exported data. This will create a file in which the information is organized into rows and each item is separated by a column, as shown in the partial view of an Assessment Detail export below.
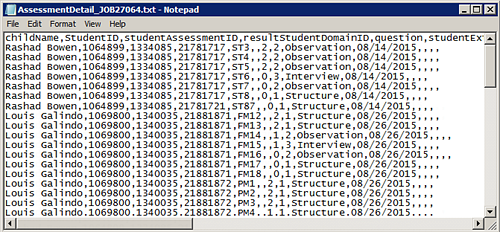
Note: This option is not available for the Migration Export.
– XML—This is the only file option available for the Migration Export.
7. Add or change your Email address (if applicable).
8. Click  to export the file or
  to
schedule an export. Please note that the following exports are
scheduled and are not immediately available for viewing and downloading:
Assessment Domains, Assessment
Details, Student and Assessment Summary,
and Migration
Export.
to
schedule an export. Please note that the following exports are
scheduled and are not immediately available for viewing and downloading:
Assessment Domains, Assessment
Details, Student and Assessment Summary,
and Migration
Export.
See also:
● Monitoring and Downloading Scheduled Imports, Exports, and Reports