Important: When
you make changes to buildings through the easyCBM Admin
page, remember to change your import file(s) accordingly before you upload
and potentially override changes.
For example, if you change the name "Hillvalley" to "Hill
Valley" using the Admin page,
you must change the name of the building in the 1_users.csv
file and the 2_students.csv file from "Hillvalley"
to "Hill Valley" before you reload those files. If you do not,
you will then have two entries, one for "Hillvalley" and one
for "Hill Valley."
Similarly, if you delete a building using the easyCBM Admin
page, you must remove the building entry from the import files (1_users.csv file and 2_students.csv)so
you do not re-load it into the system.
The reverse is also true. If you remove a building from an import file,
the building entry itself will not be removed from the system until you
delete it using the easyCBM interface.
To edit a building:
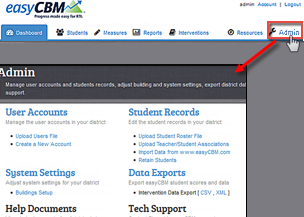
Click the Admin tab. The Admin page appears.

In the System Settings area, click Buildings Setup. The Edit Buildings page appears.

Navigate to the building you want to edit and click on the building name. The Edit Buildings page appears and displays the data for the building you selected.

Do any of the following:
If you want to… |
Then do this… |
Edit the name of the building |
In the Building Name box of the Edit Building Name area, type the new name of the building. Click Update Building Name. A confirmation message informs you that the Building Name has been successfully updated. The building name must also be updated in the the 1_users.csv file and the 2_students.csv file. See About Data Files for information about formatting and uploading these files. |
Update setup access for the building |
In the Teacher/Student Setup access for Teacher-level accounts area, select one of the following: Strict: Teacher-level accounts may not edit their class lists Grade-wide: Teacher-level accounts may edit their class list selecting other students at the same grade-level Building-wide: Teacher-level accounts may edit their class list selecting any students in their building Click Update Building’s Setup Access. A confirmation message informs you that the Building’s Teacher Access has been successfully updated. |
Delete the building |
In the Delete Building area, click Delete Building. A message appears asking you to confirm that you want to delete this building.
Do one of the following: Click Cancel to close the message without deleting the building. Click OK to delete the building. A confirmation message informs you that the building has been successfully deleted. Note: If you delete a building, you will need to update the 1_users.csv file and the 2_students.csv file accordingly. See About Data Files for information about formatting and uploading these files. |
