If your district has enabled the creation of temporary student records, your users can, as an emergency measure, add students for testing. (For instructions, see Manage System Settings > Manage District-Wide Settings > Enable and Disable Measures in the online help for Head Admins.)
For example, if a new student enters a teacher’s classroom on the day he or she is scheduled to test, the teacher may create a temporary record to add the new student to the teacher’s list. When the teacher adds a student, easyCBM creates a temporary student record and assigns a system-generated student ID (for example, easyCBM_13212. After testing, you must merge the temporary record with the student’s permanent record as loaded into the system in the 2_students.csv file (see About Data Files ). After uploading a new 2_students.csv file, you must upload a new 3_teacher_students.csv file in order to roster the student. This results in a single, complete, permanent student record containing the recent test result(s)and amounting to the use of a single license.
Important: Each temporary record uses one student license until it is merged with the actual student record created by the roster (.csv) file.
Before you begin, be sure you have the district-assigned student ID associated with the permanent record of the student you are merging. This is the value in the StudentID field for the student in the 2_students.csv file. (For more information about this field, see Acceptable Data Formats.)
To merge a temporary record with a permanent student record:
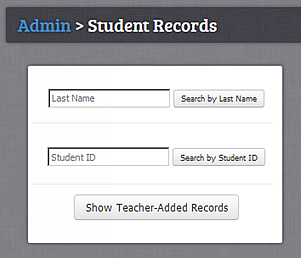
From the Admin tab, click Student Records. The Student Records page appears.

Click Show Teacher-Added Records. The Teacher Added Students page appears with a list of all temporary student records.

Open the student's record using one of the following methods:
In the Student ID column, click a student ID. The Student Record page appears for that student.
In the Last Name column, click (search) next to a student’s last name. The Student Record page appears and lists all students with that last name. In the Student ID column, click the student ID. The Student Record page appears for that student ID.
Scroll down to the Merge Student Record heading, and in the Actual Student ID box, type the student’s ID as it appears for the StudentID field in the data files 2_students.csv and 3_teacher_students.csv (for example, 107051), not the easyCBM system-generated temporary student ID (for example, easyCBM_13210).

Click Preview Merge. The Merging Student Records page appears.

Review the preview. If no corrections are required, then continue to step 7. If corrections are required, click the Admin tab to cancel the action, and follow the instructions for Editing an Existing Individual Student Record. Repeat this procedure.
Click Merge Records. The originally selected record is deleted and all tests are moved to the record specified by the ID number. A confirmation message informs you that the student’s record has been successfully merged.