1. From the dashboard shortcut, in the Search Child Name box, begin typing the child's first or last name.
The system displays child names in a drop-down list as you type. The more letters you add, the more specific the list becomes.
2. When you see the name of the child whose record you want to edit, select the name from the drop-down list.
The Child Information page for the selected child opens.
1. Access the Search/Edit Child page:
– From the Child Administration menu, select Search/Edit Child.
– On the top right of the dashboard, beside Search Child Name, click the search icon.
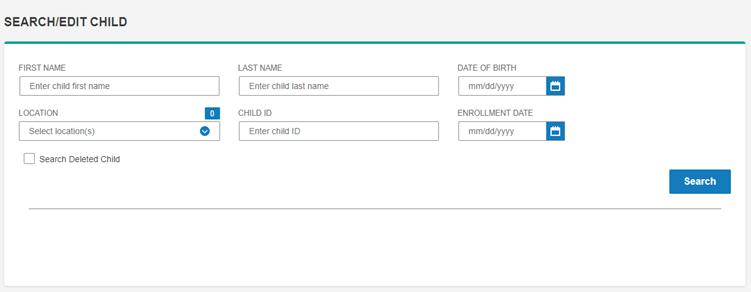
The Search/Edit Child page opens.

2. Enter search parameters in one or more of the fields, as follows:
– Enter partial, initial letters or numbers for FIRST NAME, LAST NAME, and CHILD ID fields.
– Select one or more locations from the LOCATION hierarchy.
– Select or enter the child's date of birth or enrollment date; dates must conform to the mm/dd/yyyy format.
– To return a list of all children in the system, leave the search parameter boxes blank.
3. (Optional) To view only children who have been deleted from the system, click the Search Deleted Child check box.
4. Click the Search button.
5. Children who match your search parameters are listed below the search form.

6. From the search results you can:
– Click the name to open Child Information page.
– In the Actions column:
○ Click the edit icon to open the Edit Child page.
○ Click the delete icon to delete the child record.
○ Click the add record form icon to add record forms for the child.