You can add several children or a bulk upload of children to your system using a comma-separated values (.csv) file. To do this, plan to populate the BDI-3 child template during the following procedure or to pause at step 3 in order to do this.
1. From the Child Administration menu, select Import Child Roster.
The Import Children page opens.

2. Click the here link above the Download button to open the Data Requirements document to use for entering data in the following steps.
Note: You can save the Data Requirements document as a PDF file for reference.
3. Click the Download button and follow your browser's prompts to save or open the child import data file.
The data file ending in .csv is downloaded through your internet browser.
4. Open the data file and enter information for the children in your system. You can copy information from your own .csv or spreadsheet, but the data must be in the exact column order specified by the template headings.
5. Save the completed file on your hard drive or a shared drive where you can easily retrieve it. You can use the file name of the template document or follow your own naming convention.
Important: The file must end in .csv.
6. Under the Upload File heading on the Import Children page, click the Browse button and locate the .csv file you just saved.
7. Open the file from your browser.
The FILE NAME box populates with the name of your data file, and the Upload button below becomes active.
8. Click the Upload button.
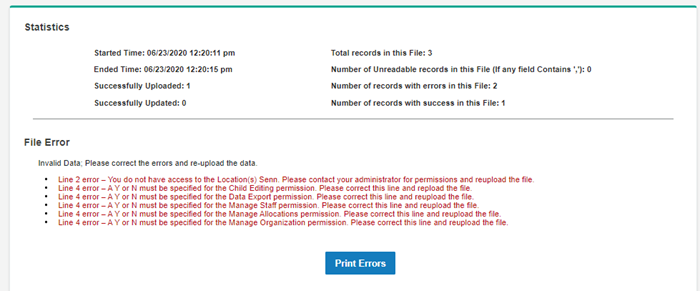
The file is imported. Information on start and end time of the import, the number of records, and the number of successes and errors display in the Statistics section of the page.
If the file contains errors, specific information on errors, including line numbers, error types, and how to fix the errors, appears in a Fix Error section below statistics.

9. If any file errors occur, follow the instructions for correcting the error(s), then follow steps 4-8 again.